Accessing Your NetSuite Data in BI Tools like Domo or database IDEs like DataGrip

NetSuite contains critical information about the finances and operations of your business. When it comes to keeping track of all of this information, NetSuite offers a powerful analytics tool called SuiteAnalytics, which enables you to explore and analyze your data within the NetSuite environment. However, there may come a time when you need to integrate this data into your data warehouse or a business intelligence platform like Looker, Tableau, or Domo for more comprehensive analysis. This setup process is not for the faint of heart, so our goal in this blog post is to help shed some light on the steps necessary to successfully get your NetSuite data flowing smoothly into your data warehouse or BI tool of choice.
Step 1: Enable SuiteAnalytics
To access your NetSuite data via SuiteAnalytics, you must first enable the SuiteAnalytics Connect feature in your NetSuite account. Follow these steps:
- Log in to your NetSuite account as an administrator.
- Navigate to Setup > Company > Enable Features.
- In the Features list, check the “SuiteAnalytics Connect” box, and save your changes.
- Ensure that SuiteAnalytics Connect is enabled for the roles that need access.
Step 2: Create a Specific Role to Use SuiteAnalytics
This role should receive all the same permissions as an admin, but not be an admin. This is important because admin roles are prevented from connecting to data tools / warehouses directly (this took me a pretty long time to figure out!). Make sure this role has access to all subsidiaries. You can use this script to create a role with access to all permissions. Warning — you’ll want to change the permissions from ‘full’ to ‘view only’ because critical mistakes can happen if the wrong users have ‘full’ access to all permissions.
One way to create this role rather quickly is to use a bundle that Nick Axeus (Reddit NetSuite legend) built that is essentially a script that will set up that role for you. The bundle ID is 387772. This is a great briefer on how to install and use a NetSuite bundle. Just be sure to reset those user permissions to ‘View’ after installing!!!!
Step 3: Establish the Connection
To access your NetSuite data via your data warehouse or Domo, you’ll need to establish a connection between the two systems. This should be a relatively smooth process in Domo, assuming you have closely followed the steps outlined above.
Information to Gather from NetSuite
- Login to NetSuite under the new role you have created for this purpose.
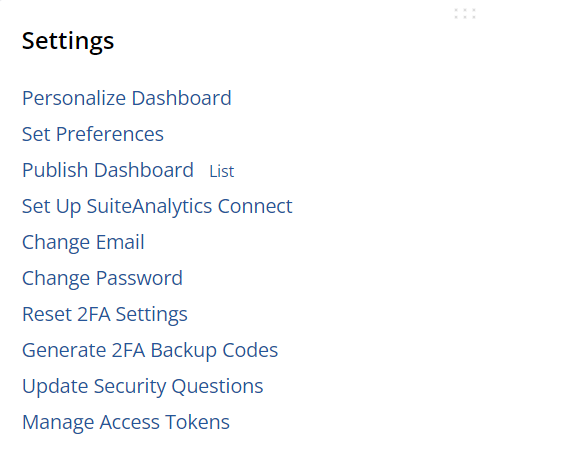
- In the bottom left-hand corner of your screen, select ‘Set Up SuiteAnalytics Connect’
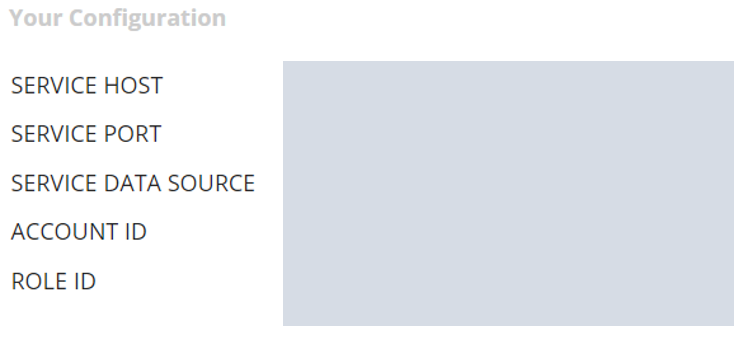
- Take note of the information seen under ‘Your Configuration’ pictured below
- Download the JDBC driver which will be useful in connecting to a data IDE such as DataGrip.

Domo
- Search for and select the SuiteAnalytics connector
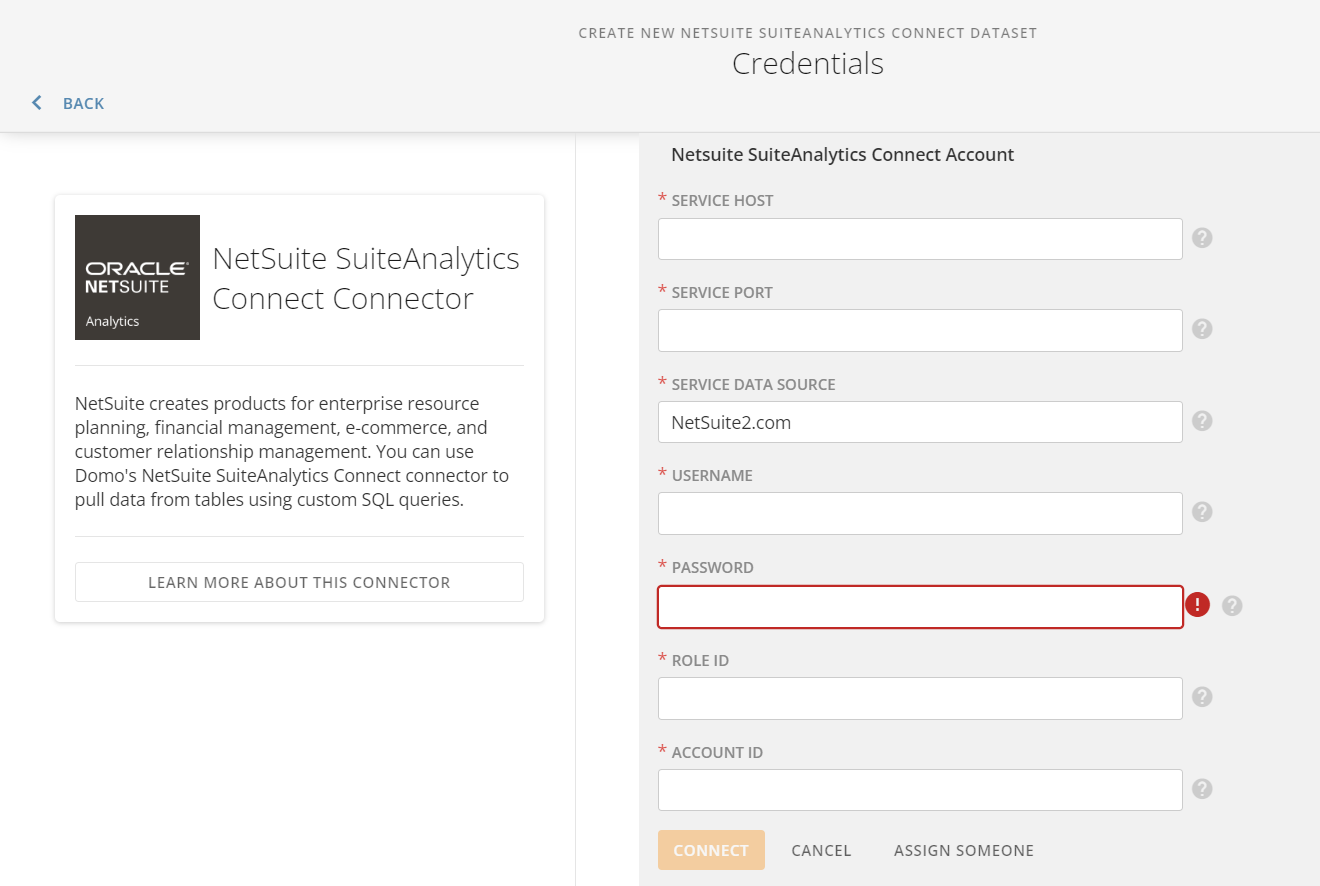
- Populate the Domo credentials as shown in the screen below, referencing the ‘Your configuration’ screen seen in NetSuite.
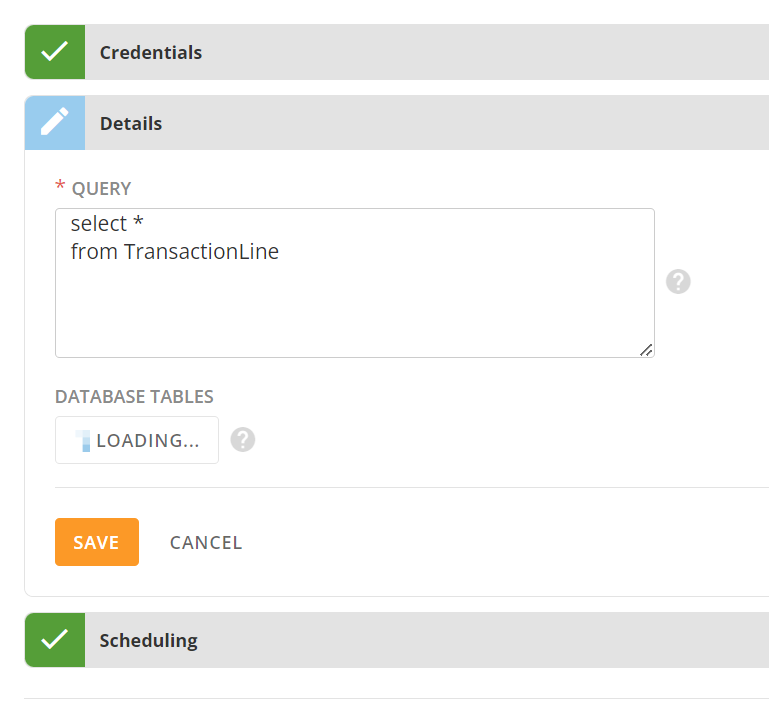
- Once you have successfully connected to NetSuite, you can begin to create data sources for use in Domo. The SuiteAnalytics connector requires you to write custom SQL to pull in the data you need from NetSuite. You have two primary options at this stage — develop pre-built queries that get you the clean data you need for use in Domo, or write simple ‘select *’ queries from key tables that you will need that can be used to combine together in dataflows in Domo after the fact.
Connect to Your NetSuite Data using an IDE such as DataGrip
- Connecting your NetSuite data to an IDE like DataGrip makes it very easy for you to explore your raw NetSuite data using custom SQL.
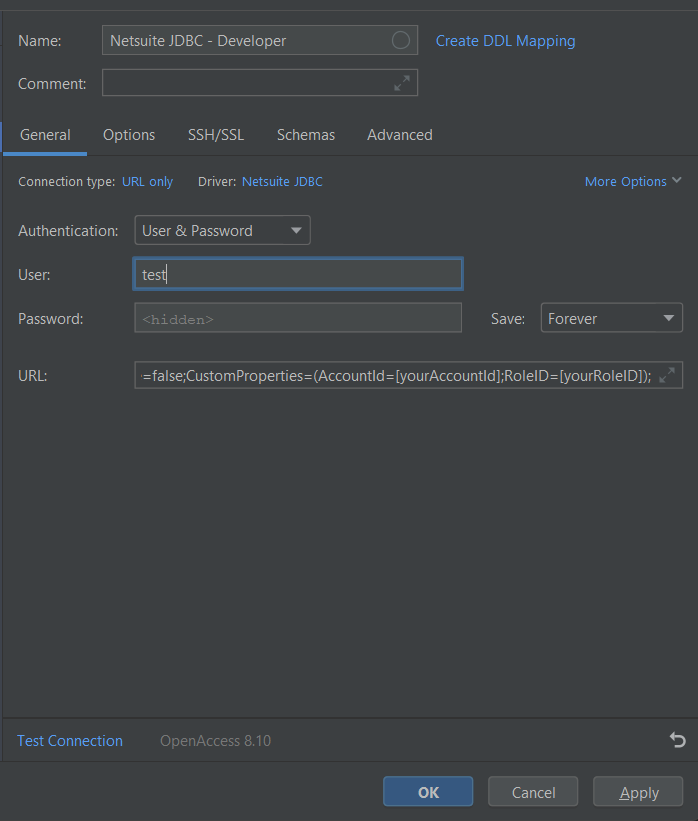
- Using DataGrip as an example, first navigate to the ‘Database Explorer’ and click on the + icon.

- Add a new ‘Driver & Data Source’
- Name the data source something relevant like ‘NetSuite JDBC Connection’
- Set Authentication to ‘User & Password’ and enter the user email and password associated with your NetSuite role that you’ve created for the purposes of using SuiteAnalytics.
- In the URL field, enter your JDBC connection string which should look something like this:
jdbc:ns://[yourServiceHostString]:[yourServicePort];ServerDataSource=NetSuite2.com;Encrypted=1;NegotiateSSLClose=false;CustomProperties=(AccountId=[yourAccountId];RoleID=[yourRoleID]);The full settings configuration will look something like the below if using DataGrip. Connecting to other IDEs should follow a very similar process.
Step 4: Schedule Data Refresh
To ensure your data is up-to-date, schedule regular data refreshes from NetSuite to your data warehouse or Domo. Depending on your specific tools, you can set up automated refresh jobs or triggers.
Conclusion
Accessing your NetSuite data via a data IDE, a data warehouse or Domo using SuiteAnalytics is a powerful way to unlock deeper insights and drive data-driven decisions within your organization. By following the technical steps outlined in this guide, you can seamlessly integrate and analyze your NetSuite data alongside other critical business data, facilitating more comprehensive reporting and analytics capabilities. Stay ahead of the competition by harnessing the full potential of your NetSuite data through SuiteAnalytics.
Please reach out to nick@southshore.llc or james@southshore.llc for assistance in getting more out of the valuable NetSuite data your business is already collecting.
